Saturday, March 31, 2012

A Natural Old Fashioned Cleaner

You may have noticed in some of my cooking photos that our kitchen cabinets are dated varnished pine unique!  I go back and forth about what to do about them.  Some day soon I will have an answer and share the transformation with you...and by soon, I mean within the next five years!

For right now we're stuck with them.  They've been looking really rough lately, dirty and dull so I did some research on how to clean varnished wood.  I was excited when I came across an article on 'green and thrifty old school hacks.'  The hacks, or ideas, reminded me of a post by my friend Suzy just this week on using an old cookbook.  I am a fan of doing it the "old fashioned way." If it worked then, why change it?

Anyway, back to the cabinets...one of the old school hacks was to use tea as a cleaning agent for varnished wood.  Perfect...we have lots of tea and you can't get much simpler than brewing some tea!

I brewed about 6 cups of "tea." 
This was actually way more than I needed, 2 or 3 cups would have been enough. 

Once I brewed my new cleaning solution I put it in the fridge to cool off just so I wouldn't burn my hand, I don't think the temperature has any effect on its cleaning powers!  
Using a rag I wiped the cabinets.  
(I was reminded of how much I love the look of tea stained fabric!)


This process was so simple but one little warning...your fingers will become a little stained, so if  you are concerned about that you might want to wear gloves. 

I was really impressed with how well the cabinets shined up.  Here is a before and after. 

Peanut wanted to know why the cabinet smelled like tea though! 


I decided to try and save the tea mixture.  I'm not sure how it will keep, but it's worth a try! 


I now feel inspired to start using more old fashioned tricks!


Lessons From the Litterbox

As a result of the remodeling happening on our second floor that I shared here, it was necessary to relocate the cats' litter box.  I always heard that cats can find a litter box no matter what. Well I am here to tell you that is not true! We moved the litter box, which has an automatic cleaning system, literally from one end of the house to the other.  The noise that the litter box makes when it's cleaning is loud!  It can be heard from most parts of the house; however this did not help both the cats find it.

Peanut had no problem finding the box.  He is in fact obsessed with it and always watches it while it cleans...as soon as the motor starts running, he starts running to watch the box!  I was pleased with Peanut for finding the box right away, it is rare that Peanut is the one to do something right.  (We often joke that his name should have been Trouble!)
Valentine unfortunately did not catch on to where the litter box was moved to...but luckily there were no accidents, she apparently has an AMAZING bladder!
About 30 hours after I had moved the box Valentine was meowing but differently than normal.  She seemed distressed.  I immediately got worried that she didn't know where the litter box was so I took her too it.  She sniffed a bit, but still didn't go in.  I then put my hand in and made the litter make noise...she leaped through the air into that box!  I was so proud of her! 1. For not having an accident and 2. For coming and telling us something was wrong.  She got so much love and praise after that!


Big lesson learned: Not all cats can find the litter box on their own.  It might have been her age or maybe her senses are going, but even if you have a young cat make sure they know you moved their litter box and where you moved it to!

Thursday, March 29, 2012

Robin Egg Centerpiece

We have a large dining room table that looks very naked without a centerpiece.  I try to keep up with the seasons and change the centerpiece appropriately...it doesn't always work, but I try!

I absolutely love the color or robin eggs so I wanted to make some and use them as a part of the centerpiece!


The eggs were very simple to make!  I used paper mache eggs.   


I actually loved the natural look of the eggs before I painted them so I might buy some more and use them without any paint somewhere else. 

I used 2 coats of blue paint to cover the eggs.  While the second coat was still slightly dry I took a brownish gold paint and spattered it on the eggs to create the brown flecks.  

The splattering allows the flecks to be random in size and pattern.


To use these eggs in a candle centerpiece I put some curly Spanish moss in the candle holder/vase to create the look of a nest, then added the eggs and a candle.  
Very simple and adds a cute natural element to the dining room table!  


Tuesday, March 27, 2012

Chorizo Pie

I like cooking with Chorizo.  It adds a nice amount of spice and a good robust flavor to dishes.  During a stroll around Pinterest I found a recipe for a Chorizo and Chicken Pie that I adjusted.  The original recipe can be found on Eat Like a Girl.

My other half raved about this dish and said it is one of the best meals I've ever made!  This one is definitely going in the rotation!

I chose to make these in individual casserole dishes, but I'm sure it would taste just as great in any dish! I had plans to take a picture of the final dish after we ate, but wasn't able to..."somebody" ate my extra 3rd dish, which I planned to photograph (and have for lunch tomorrow).  You will just have to imagine it with yummy, fluffy, flaky pastry on top!

Chorizo Pie
Preheat oven to 350°F

Ingredients:
2 Tbsp olive oil
8 oz Chorizo
3 large garlic cloves - finely chopped
12 oz diced tomatoes
2 tsp Paprika
salt and pepper to taste
1 sheet of puff pastry
1 egg, beaten

Remove the casing from the Chorizo and roughly chop up.  Heat the oil in a pan then add the Chorizo.

I absolutely love the smell of Chorizo cooking! 
Once it starts browning and the oils start releasing add the garlic.  Cook over medium heat 3-5 minutes.

Add the tomatoes and paprika.  Bring to a boil then reduce the heat and simmer for 10-15 minutes.  While that is simmering, oil your dishes and cut pastry to fit as a lid to your dish size.

When the pie filling is ready divide it evenly among your dishes.  Cover with the pastry.  Pinch the pastry lid to ensure the pie filling doesn't boil out in the oven.  Brush the tops with egg and bake for 20-30 minutes.

When the pastry is crisp and brown they are ready! Let cool a few minutes before serving.  Enjoy!

Linked to: Tuesday Talent Show, Take A Look Tuesday

Sunday, March 25, 2012

Saving Dryer Sheets

I've heard and read so many different uses for dryer sheets, besides the obvious! Recently I decided to save some from laundry day and use them as dusting cloths!  It was AMAZING!  I couldn't believe it!  What a great way to reuse something that would have gone into the trash!  I really like using them to dust fabric things like lampshades, our roman shades etc.

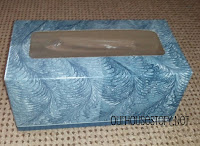
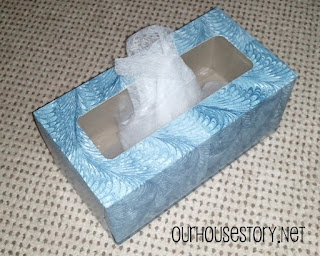
Now that I like reusing the dryer sheets I save them, but I didn't have a good way to keep them until I was ready to use them.  I had to come up with something.  At first I thought of using an old Clorox wipes container, but then I thought the top would tear them when I pulled them out.  Then it hit me...a tissue box!
Unfortunately I only had a large box empty, a smaller box would be better for our home.  Since there are only 2 of us I don't use too many dryer sheets before I need them for dusting, but I imagine a home with more loads of laundry might need the large box!

Peanut decided to help me with this little project.  He checked to make sure the tissue box was empty and ready to be re-purposed!

Now I gather all the dryer sheets on laundry day and stick them in my box until dusting day!

Simple. Free. Reusing.  

Saturday, March 24, 2012

My New Friend Ginger

I never really knew if I liked ginger...the spice that is! If I was eating out and the meal came with it, I wouldn't think twice about it, but I never cooked with it.  Today I bought, grated and ate fresh ginger for the first time...and I like it!

Photo credit: suzyhomemaker.net
My friend makes great homemade salad dressings so I wanted to try her Asian 4-1-1 dressing.  In order to make it I had to figure out how to cook with fresh ginger.  When I put the ginger root on the counter it seemed to be staring back at me saying, "Hahaha, you don't know how to peel me!"  It was right...I had no idea!  Thank goodness for Suzyhomemaker!  She has a simple video showing how to use a spoon to peel the ginger.  Check it out here.  Once I watched that I knew this little root had nothing on me!  I peeled and grated it with no problems, what had I been so worried about?


The next issue was going to be if I actually liked the taste of ginger once I added it to the salad dressing.  I put the Asain 4-1-1 dressing on an Asian slaw salad that I shared here.  It's official, I like ginger, it has such a nice spice to it!  And now for the part where you get to have a good laugh at me...as I was eating my delicious lunch my brain clicked.  Or maybe my taste-buds and stomach talked to my brain and said, "Duh, you like ginger ale!  What do you think is in that?"

So now I have some fresh ginger ready to be added to another recipe...wonder if my other half will like it...hmm, he does like ginger ale!

Thursday, March 22, 2012

An Asian Twist on Slaw

This is a great time of year to get cabbage!  At my local farmer's market I got 2 heads for $1.00.  Initially I thought I'd make coleslaw, but then decided that was too obvious!  I gathered some inspiration from Suzyhomemaker's Asian Salad and Once Upon A Chef's Asian Slaw.  I wanted to mix it up a bit based on what I already had in my veggie drawer.


Since this slaw was just going to be for me I went crazy mixing lots of textures together.  I grated the carrots but shredded the cabbage.  I diced the green pepper but left the water chestnuts sliced right from the can. I browned some ground beef to add a little protein. (I think I will use chicken next time but the ground beef was the only meat defrosted.) A sprinkle of some green onions on top and I was ready to dig in!


It was great and kinda fun to eat with the long "noodles" of cabbage!  Next time I will add some chow mein noodles for an extra crunch.

Tuesday, March 20, 2012

A Snowman on the First Day of Spring??

I had been hoping for a nice snowy day to post about my snowman, but since today is the first day of spring I think I'm out of luck!  I couldn't wait till next year to share my little friend though!

This little guy was simple to make and can easily be adapted to add character or made to match your home's decor.  For example, I gave him a burlap scarf but you could make a knit scarf or even lace if you wish! 

I started by making three balls of yarn slightly different sizes and connecting them with a tube.  You could use a paper towel tube, but I found this smaller one I chose to use.  Be sure to add a little adhesive to secure the tube and yarn balls together.  I chose to use hot glue but I think any type of glue would work.

I then used twine wrapped floral wire for the arms.  
For his face I used felt chair pads (the little black spots to keep chair legs from scratching the floor).  His nose is my favorite part...I found a toggle button and painted it orange! Then I simply added a little burlap scarf. 


A black spray painted hat and he was complete! 


Sunday, March 18, 2012

A Place for Mail

If you are anything like me you don't go through your mail everyday...especially the coupons and catalogs from stores.  I hate seeing piles of mail though!  I am however a fan of hiding piles of anything inside baskets so mail baskets seemed the perfect solution for our mail.

I found some simple baskets on sale at Michaels and snatched them up.


To add a little organization I painted and adhered our first initials.  I wanted them to be subtle so I used my favorite oil rubbed bronze that I talked about here.  The color was very similar to the brown in the basket, which is what I was going for.

We've been using these baskets for awhile now and the only problem with them is they fill up too fast!

Wednesday, March 14, 2012

Coconut + Meringue = YUM!

I have been trying to use my Kitchenaid mixer on a weekly basis as I mentioned here.  It came time to make a cake for my grandmother's birthday (87th) and she likes coconut cakes, so I did some searching and came across a recipe for Coconut Meringue Cake.  It was perfect, I've been wanting to try making meringue in my mixer since I got it at Christmas!  This past summer I attempted a lemon meringue pie...but a bad mixer and the summer heat were all against me!  It was traumatic to say the least...I swore I'd never make meringue again!  That is until Santa brought me my Kitchenaid!

The cake was simple - a layer of basic cake topped with fluffy meringue.  I was a little nervous as I put the ingredients together for the meringue.  As soon as I turned on that mixer though my fears were "beat" away! I turned the mixer up high and just let it do it's job...it was amazing!  
You can barely see the whip...I couldn't believe it went that fast! 
 I even did the official meringue test and held the bowl upside down to test if it was done...not a drip!  Once the meringue is whipped you stir the coconut in then simply layer the cake batter and meringue!

Simple & delicious! I might try using the coconut meringue on other things as well...it is THAT good!


Now that I am over my meringue fear I'd like to try making some fun spring meringue treats...any ideas?  


Sunday, March 11, 2012

I might be a hoarder...

I fear that I might hoard cleaning supplies!
I am very conscious of not falling for the marketing of new supplies but I do like to try new things when I see them...and yes, that is very different! Recently I was at the grocery store and spotted a dry mop.  I instantly thought it was worth a try for gathering the pet hair that accumulates daily on the hardwood floors.  So far it's been great!

Speaking of floors...I am obsessed with them being clean!  With a dog and 2 cats running freely though the house you can imagine how dirty the floors get.  I am in love with my hard floor cleaner.  It is a wet/dry combo vacuum and it does a great job removing those little (and big) paw prints from my white tile floor!
When you're this cute you can leave paw prints anywhere you want! 

Basically all around the house there is a plethora of cleaning supplies, I never get to the bottom of any because I'm always buying a new one to try. Does that make me a hoarder? My other half says it does!

I am going to challenge myself to use up everything I have before I buy something new...even if I have a coupon and it's on sale! (that will be the challenging part!)

Wednesday, March 7, 2012

Cinnamon Heaven

I've discovered a new blog with awesome recipes...I'm almost as addicted to them as I am pinterest.  The blog, Six Sisters' Stuff share crafts in addition to their recipes.  It was the recipes that got me hooked though!

I set a goal for myself this month to use my kitchenaid mixer once a week so when I saw a pin on pinterest for Six Sisters' Stuff Cinnabon Cinnamon Roll CakeI just had to try it!  Who doesn't love Cinnabons? 


It really is super easy and yummy!  


I made a small attempt to make it healthy by omitting the glaze and using slightly less sugar in the cake and cinnamon mixture.  It still turned out delicious!! 


Check out their site for the full recipe, then just use a little less sugar depending on how sweet you like things.  The one thing I would not suggest cutting is the butter...that's what really makes this cake amazing!  


Also, serve it right from the oven...it is heaven!! 

Monday, March 5, 2012

It's Not Easy Being Green

I have been living with green...and when I say green, I mean GREEN!  Green carpet, green paint and even green inset paint on the doors!  I have patiently waited months...make that years for the green to be erased.  I even shared my hate for the green in this post. Finally this weekend the green carpet was evicted!

We had no idea what was under the carpet, so I was a little nervous knowing we'd be living with whatever it was for a while as we paint and re-floor the entire upstairs.  I had nightmares of broken floor boards from the 1900's full of splinters that would get in people and animal feet!  Boy oh boy was I surprised!
First layer under the field of green was of course carpet padding...


second layer...

VINYL!  I couldn't believe it!  It's a sheet of vinyl on top of the original floor boards...what a relief!  Laying a new floor will be simple (so we hope) on top of that!

We have a bit more carpet that has to come up, then we'll paint and lay a nice new floor!  I can't wait...stay tuned...I'm sure it won't be this easy much longer!

Thursday, March 1, 2012

Simplest Chicken Ever!

Just the other day suzyhomemaker shared a simple recipe for chicken in the crock pot.  Coincidentally, my grocery store had whole roaster chickens on sale for $.99/lb so I thought it was the perfect week to try this new recipe!
The recipe is SO simple...rub the chicken with some spices, plop it in the slow cooker and you're done!
Suzyhomemaker suggested a few seasoning options but since I am planning to use the leftover meat in a tortilla type soup I opted for something with a bit of...we'll call it Mexican flare!

I cooked mine on low for 8 hours, but by 6 hours the popup had popped so I tested it with a meat thermometer and it was done.  Since it was done early, I basted it with its own juices and put the slow cooker on warm!  The meat was so tender it was falling off the bone just from the pressure of the juices flowing over it!  At that point my mouth began watering...but I had to wait another 2 hours for dinner, so I put it on warm and basted it a few times.

Finally, it was dinner time...I was very excited to try this chicken that was smelling so yummy!  I attempted to lift it out to carve it and the entire chicken crumbled!  Apparently it was overcooked! The bones and cartilage just fell to pieces.  I was heartbroken...but I saved a good amount of meat, which was delicious!!

I will definitely make this chicken again, but now I know the correct timing!
Lesson learned: The chicken keeps cooking, even on warm!
Related Posts Plugin for WordPress, Blogger...