Friday, August 31, 2012

An Apron or Laundry?


I never wore an apron...maybe as a kid...I vaguely remember a little chef outfit.  But as an adult I never bothered.  However, the more I got into cooking and baking the more clothes I was ruining so I thought I'd give the apron idea a try.  I am here to tell you it's a pretty neat thing!

According to Wikipedia there was a decline in apron wearing during the 60's when washing machines and clothes became cheaper.  I can see how that could happen but I also know (from experience) that some stains do not come out in the washing machine!  If you take a close look at one of my aprons you can imagine what my clothes would look like if I wasn't wearing the apron! (I have a terrible habit of wiping my hands on my clothes.)


The apron is coming back though.  I'm sure you've all seen the gifty types with fun sayings for Dad at the BBQ or Mom favoring a glass of wine over cooking.  I have four aprons, two of which are "fancy."

This first one even has matching pot holders...very fancy!!

The apron below is actually from Italy.  It is customized with my name.  As you can imagine I do not wear this one...it's so fancy that it's just for decoration!


The one thing that all my aprons have in common, which I think is essential is a pocket!  I suppose originally the pocket was meant to hold eggs or produce gathered from outside before starting the cooking or baking.  I tend to keep a dishtowel in mine for drying my hands.  

So what do you prefer...wearing an apron or doing laundry?  Have you joined the apron renaissance? 
What do you look for in a good apron? 


Wednesday, August 29, 2012

Homemade Hummus

I am a huge fan of hummus, especially now that I am trying to pack as much nutrition into small meals!  Chickpeas are loaded with protein and fiber; two important elements of my preggo diet!

Recently my aunt made some delicious homemade hummus for a family picnic, it was great and has now become my own go to hummus!  The store bought hummus has added ingredients to preserve freshness that I would like to avoid if I can.


Surprisingly because of where I live finding tahini, one of the main ingredients, was a challenge!  I finally got my hands on some and created my first batch!

This recipe was quick and simple!  Gathering the ingredients probably took more time than actually making the hummus!


HUMMUS(Adjust to your taste.)
1-2 cloves Garlic
1 can Chickpeas...drain saving 1/2c bean water
Splash - 4 Tbs Lemon Juice
2-3 Tbs Tahini
1-2 Tbs Olive oil
1 Tbs Tamari or any low-sodium soy sauce
Salt/Pepper to taste


Place all the ingredients in a food processor and blend.  


Sorry the picture is a little gross, the tahini was dripping down the side!

Once things start getting blended you'll notice it is a bit thick.  Add small amounts of the saved bean water (1 Tbsp) at a time into the hummus mixture until you get to your desired consistency.  

Place in a bowl and enjoy!  I love dipping veggies into my hummus!   


Monday, August 27, 2012

Baby Countdown

40 weeks is a looooong time!  There is so much to do & prepare so the long amount of time is nice but waiting is just not something I'm very good at! So I decided to make the waiting a little bit more fun by creating a countdown jar.

I took a vase/candle holder and re-purposed it for the next few weeks.  I only used materials I had on hand and wanted to make sure the end result would blend in with our decor since it would be on our mantle for quite some time!


I placed a piece of burlap in the bottom of the jar then used twine to accent the shape of the jar near the top.


I painted a square piece of wood black and used a silver sharpie to write the words.  It was fun to create and did not take long at all!


The next step was filling the jar.  I counted out the number of days that were left till the baby's due date.  At the time is was 195.  So I placed 195 Hershey kisses into the jar.  Each day we remove one of the kisses.  As of now we can't see the top of the kisses, but once it gets down further it will be fun to watch them disappear as we get closer to giving real kisses to our little baby!


Friday, August 24, 2012

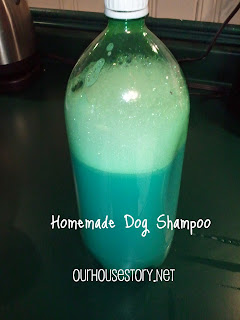
Homemade Dog Shampoo

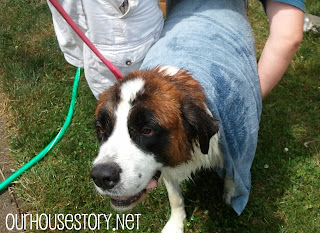
As much as I hate the summer heat, Sanka hates it even more!  Her thick coat just sheds and sheds - huge clumps!  And yes, those huge clumps then cause me to vacuum everyday!  (not fun in the heat!)  To help end this vicious cycle we decided to give her a bath, hoping it would cause a lot of the loose hair to come out.

I have always used store bought dog shampoo but recently saw a variety of  homemade shampoos on pinterest so I thought I'd give it a try! I read what several other people had done, took inventory of my own supplies and created our very first homemade dog shampoo!

ourhousestory.net: Homemade Dog Shampoo

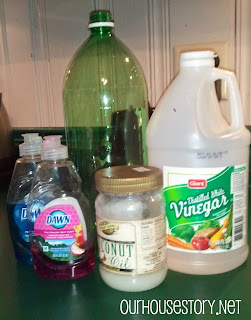
The ingredients are simple and cheap! 

ourhousestory.net: Homemade Dog Shampoo

I used equal parts vinegar and Dawn dish detergent.  (I didn't have a full bottle of one scent so in addition to original scent she got some pomegranate, which ended up being quite nice!) I added approximately 1/2C of coconut oil.  

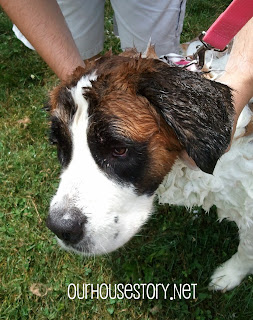
The next step was getting Sanka prepared.  She is not a fan of outside baths with a hose so she was not happy about this situation! 

ourhousestory.net: Homemade Dog Shampoo

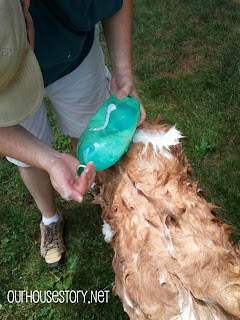
Once Sanka was wet poured the soap into our hands and onto her fur and scrubbed away.  
The hair just came off in clumps.  

ourhousestory.net: Homemade Dog Shampoo

As you can see Sanka's favorite part of a bath is getting toweled off!  

ourhousestory.net: Homemade Dog Shampoo

We were very pleased with this shampoo.  She still needed some good brushing for the next few days but the clumps around the house were much less!  She smelled and felt great too!  At first she did have that wet doggie smell, but that went away and she just smelled clean! We always joke after she gets a bath that we forgot she had white fur until we see it clean again! 


Wednesday, August 22, 2012

Cornish Pasty

Cornish Pasties are a popular meal in the southwest of England, particularly Cornwall.  That is actually where I had my first pasty and fell in love with the simple yummy meal!  Pasties became a popular meal in Cornwall because it was something the tin miners could take with them for lunch and easily hold in their hand to eat.

I recently attempted to make them from scratch.  They didn't turn out as good as the ones I ate while sitting on the seaside in Cornwall, but I was pleased and we'll be having them again!

This picture does not make them look appetizing, but trust me, they are good!
The most time consuming part of making pasties is the dough.  You could cheat and use pre-made dough, which would speed up the prep time. The inside of the pasty is simple.

Cornish Pasty

Pastry - the same amount you'd make for a pie (top and bottom)
1 lb ground beef
3-4 red potatoes
6 oz. frozen carrots
6 oz frozen corn
Seasoning
1 egg
1 Tbsp milk


Preheat oven 325º
Brown your ground beef then add the potatoes and cook over medium heat until the potatoes are soft.

ourhousestory.net: Cornish Pasty

Next add the carrots and corn.  Use your seasoning of choice.  I used an all purpose seasoning mix. Turn the heat down and cook over low heat for another 3-5 minutes. 

ourhousestory.net: Cornish Pasty


While the meat mixture is cooking roll out your pastry and create 4 circles with about 6" diameters.
Spread the meat mixture among the four circles.

ourhousestory.net: Cornish Pasty

Fold each circle in half and pinch the edges.  

ourhousestory.net: Cornish Pasty

Use a fork to poke steam holes in the top of the pasties.  Mix 1 egg and  the milk together and brush the pasties.  Place on a baking sheet and bake for 45 minutes or until the pastry is golden brown.

Serve with gravy.

Note: Feel free to add any vegetables you prefer, but as I've mentioned before, in this house I can't sneak any green in!


Monday, August 20, 2012

A New Chapter

It's been a few weeks since my last post, I have been very busy though working on the newest chapter for our house story!  The chapter won't actually be released till mid February but my body has already started prepping!  Have you guessed what our new chapter is about??


We're having a BABY!!!!!!!!! 


We are both very excited and anxious; however the past few weeks were a bit rough for me, hence why I haven't been posting!  I am now in the 2nd trimester and my body seems to have finally adjusted to its new job!

There are days when I think I don't know if I can wait till February to meet this little addition...then there are times when I think how are we ever going to get everything ready by February!  (And no those aren't the hormones...that's just me!)

In addition to the normal getting ready for baby stuff we have a big project we started and haven't finished that MUST be finished!  You might remember back in March when I shared that we ripped the ugly green carpet up from our hallway and front bedroom...well we still haven't replaced the flooring!  And before we can start on any of these indoor projects, which of course include creating the baby nursery, we need to paint the outside of the house!  Somehow it will all get done, right?

So anyway that is what I have been up to!  I am back now and ready to continue sharing recipes, home renovations, and craft projects!  I'm sure many of these posts will have a new angle as we work on this new chapter!
Related Posts Plugin for WordPress, Blogger...