Friday, September 28, 2012

Wood Carrier

For my Dad's birthday this year he asked for a wood carrier to transport logs into the house to be burnt in the wood stove.  


He had one that my Mom had made for him probably 30 years ago...it definitely lasted a long time! I used his old one for size measurements and as a basic idea.  I also found one on pinterest that I used for inspiration, you can view it here

I used duck cloth as the main material and there are wooden dowels across the top.  

First step was to create the beige stripe.  The strip was only on the front but you could do it for the whole carrier.  I chose to make the stripe 1/3 of the carrier's total width knowing the beige handles would be equal widths on either side of the stripe.  I folded right sides together and sewed the length of the material, then flipped it inside out creating a pretty seam.  


Once the stripe was done I attached it to the brown material.  I sewed down each side of the stripe with that pretty seam I had just created hidden in the back. 


Next was to actually create the brown body of the carrier.  I chose to double the material to make it stronger and also eliminate any seams on the edges where the logs could catch.  
I sewed the brown material the same way as the beige stripe. 


Now it was time to sew the handles.  Following the same idea of sewing right sides together I sewed up from the bottom leaving 1 1/2 inches at the top for the dowel to go through.  


There are 4 handles total.  Once they were ready to be attached I folded the open edges of the brown carrier body tucked the handles in and sewed straight across!  

As a fun added touch I decided to add a T to the carrier.  


My Dad's initials are TTT so he can choose what the T stands for! I traced a wooden T onto the dark brown then used iron on adhesive to attach it to the beige stripe.  

This is a picture of the wood carrier's first load of the season! We'll see if this one lasts 30 years! 


Wednesday, September 26, 2012

Honey Apple Pouches

Have I ever mentioned how much I love honey??  Well I love it A LOT!!  I especially love when I have honey bought from a farmer as opposed to the food store honey in a bear...don't get me wrong, the bear is cute, but there is something about fresh farmed honey!

Anyway, fall is the perfect time of year to use honey as an ingredient because it goes perfectly with apples!  My Honey Apple Pouches combine honey, apples and puff pastry...how amazing does that sound?


Ingredients: 
(These vary based on the number of pouches you plan to make.  The corstarch, honey and cinnamon are based on 6 pouches)
Pastry Sheet(s) - 1 sheet makes 6 pouches
Cooking apples - each pouch uses approximately 1/4C apples
2 tbsp cornstarch
¼ cup honey
½ tsp cinnamon
Butter
Cinnamon/sugar mixture

Prepare puff pastry.  I will admit in my case it just meant thawing the frozen pastry.  I no longer feel guilty about using store bought puff pastry though since I saw an episode of Jamie Oliver where he said he uses store bought!  Cut each sheet into 6 equal squares.  Place the squares on a greased cookie sheet.  I prepared the honey "sauce" at this point so the apples would be exposed to the air for the least amount of time.  Mix the cornstarch, honey and cinnamon well.  Now back to the apples...


Peel and dice your apples.  I cut large chunks since they shrink when heated.  Place a good amount in the center of your pastry square.  


Once all your squares have apples drizzle the honey "sauce" equally among the squares.  


Fold up the pouches.  I simply pull the corners into the center and up, then cup the pouch in my hand pinching the sides closed.  Leave a little opening at the top of the pouch to allow steam out while the apples cook.  


Melt and mix your butter with a bit of cinnamon sugar. (this is really based on your own preference.)  Brush this mixture over each pouch.  


Bake at 400 for 10 minutes, then lower the heat to 375 for 20 minutes. 


Eat warm or at room temperature...you could even go crazy and top with some ice cream!! 


Monday, September 24, 2012

A New House Coat

Do people still wear housecoats?

Don't worry this post isn't really about housecoats...it is about our house getting a new "coat"!

We have taken on the project of re-siding our house.  Originally it had a mixture of clapboard siding and shingles.  The shingles were worn and we lost a few in wind storms so we decided to replace all the shingles with clapboard siding.

In this picture you can see the different materials by the paint color.  All of the red is shingles.  The yellow is the existing clapboard.

This picture also shows you the wonderful angles we get to work with.  We don't have very many straight walls...and those that are meant to be actually aren't either!  Ahhh the joys of an old home!!

One of our fears was that we had no idea what we would find under the shingles, especially since it's such an old home!  We were very pleased to find dry solid wood!


The first section we did was the downstairs "bump-out."  We decided this was a good place to start since we could stand on the ground and reach everything!  No need to start out 10 feet above the ground! 

Once the old stuff was removed we had to start layering it back up!  First layer is tar paper, which easily gets stapled up!  


We didn't staple the bottom of the tar paper though since we needed to attach flashing.  


The combination of tar paper and flashing are like a rain coat for the house.  

Once those were all set the pretty layer finally went up! 


We had purchased primed wood so it looks painted in this picture, but it's not!  
We're going to complete all the siding, then do the painting!  

Next spot is the back of the house, then onto the 2nd floor...that's when I'll be very nervous! 

Sanka is not a fan of this project, she doesn't like all the power tools!  This picture makes me laugh so I just had to share it!  She was looking at me like "this project is really getting on my nerves!"


Friday, September 21, 2012

Farmer Fail

While it is true that half of my genes come from farming families I seem to have missed out on those genes!  I have finally admitted that I am just not meant to be a farmer...or at least not have a garden!  (I'm not ruling out my ability to care for animals!)

This summer I tried growing tomatoes, green beans, carrots and peppers.  


Sadly, I got one cucumber, 3 beans and a bunch of very small carrots.  


We're a big fan of baby carrots in this house so it wasn't a total loss!  
I threw these into some chicken soup and they were delicious! 

I'm super excited that cooler temperatures have arrived...in this house that means - SOUP!!! I will be sure to share some of our favorite soups soon! 


Wednesday, September 19, 2012

Scented Pine Cones

I love walking into a craft store and getting a whiff of the scented pine cones! The problem is when the holiday season is over the scent is gone but the pine cones still look good.  To keep the pine cones from last year smelling nice I decided to "re-scent" them.


This was so simple and cheap!  All you need is pine cones, fragrance oil and a Ziploc bag. 
I chose to use Amber Vanilla for a warm cozy smell.  

Fill a Ziplock bag with your pine cones then pour in 1/8-1/4 of the oil into the bag.  Seal and shake till it looks like the pine cones are well coated!  


I left my pine cones in the sealed bag for one week.  I'm not sure if this was necessary or not, but I wanted to give the pine cones a chance to absorb the oil.  


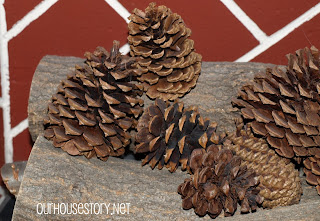
I love how the pine cones look and smell in our fireplace!  


Monday, September 17, 2012

Baby Room Progress

22 more weeks to go!  As I mentioned in my 17 week update we've started work on the baby room.  The project has become a bit more than we expected but we're both glad we've made the decision to do it all!

So far the floors have been prepped for new hardwood, the old ceiling tiles are almost completely removed and we moved a wall!  (Well I didn't actually have anything to do with it since it was a dusty job!)

The room originally had a large closet, which was nice...but not necessary for a baby/child.  We thought about it and talked about how the room would work and decided it made more sense to have greater floor space and a smaller closet.  

This is almost a before photo.  
(Please excuse the pixelated hard working man in the bottom of the picture!)


By eliminating half of the closet we gained a 5 ft x 3 ft amount of floor space!  
The perfect nook for a crib! 


The closet organizer slid right over into its new place...that was one thing I didn't want to lose! 

We were lucky that we were able to use all the existing materials...we literally just moved the far closet wall over to what would have been the middle of the two closets and wala a little taping and spackling and we have a new nook! 


These photos give you a glimpse into the ceiling tiles that are coming down as well as the wallpaper!  I can not wait to get rid of the "green"!! 


Friday, September 14, 2012

Pinterest of Interest


I've decided to start a new monthly post where I share what I've found on pinterest as well as my "review" of it.  As a self diagnosed pinterest addict I often get recipes, cleaning ideas, projects, decorating ideas etc. from the site.  Some of these ideas work out great or taste great while others don't!

Homemade Products/Tips

This past month I've been gathering homemade cleaning products to help cut costs as well as use more natural (aka less chemicals) products around the house.  I've already shared our adventure with Homemade Dog Shampoo...and that was just the start!

About 3 weeks ago I started using the infamous Dawn and Vinegar solution to clean the shower/tub.  It's great, works really well, even removes the hard water stains!
Tub & Shower Magic (Dawn & White Vinegar)
Link

My most recent household replacement is homemade Febreeze.  I use it on the couch and carpet without any discoloration!  
Vinegar homemade version of febreeze no fabric softener
Link

Food 

I have been pinning tons of recipes for fall and winter so I haven't tried any of them yet...I can't wait to try them though!  Especially all the pumpkin recipes full of nutmeg and cinnamon! YUM! 

One of the recipes I did try I had high hopes for but was disappointed.  This would be a good base recipe but it definitely needs some excitement added to it!  It was a Cheesy Chicken & Rice Casserole.  All of our favorite ingredients were in it: cheese, chicken, black beans, corn & salsa...but it just didn't work! 

The original pin is from Tasty Kitchen.  Here's the link to check it out and see what you think. 

A recipe that I did have success with was Coconut Oil Zucchini Bread. 
Coconut-Oil-Zucchini-Bread (2)
Link
I made one large loaf and two small loaves.  On one I added some shredded coconut to the top to make it look pretty, and I actually preferred the flavor of that loaf...but really it was all delectable!

Quotes/Sayings

I stumble upon quotes that ring true for me quite often on Pinterest but over this past month I'd have to say this one is the most special I've seen! 

Pooh
Link
These few pins are only a sample of what I've pinned recently...I'd love to have you follow me to see what else I've been able to discover in the world of Pinterest! 
Follow Me on Pinterest


Wednesday, September 12, 2012

Steak Soup

I had some steak in the freezer I wanted to use up but the weather wasn't nice for grilling so I decided to try making a soup.  I found a recipe from Gray Cardiagn for Crockpot Steak Soup.  I changed a few things with the recipe based on our preferences and what I had in the house already.


Ingredients
3 C. water
1can diced tomatoes with garlic and onions
6 oz frozen carrots

5 oz frozen corn
1 lb. sirloin steak, cubed 
4 beef bouillon cubes
1/2 C. butter
1/2 C. flour


Place everything (except the butter and flour) in the crockpot and cook on low for 9 hours.  During the last 1 1/2 hours I added the roux of flour and butter.  

This smelled so good cooking away all day!  It was excellent paired with the homemade French bread I made and shared here


Monday, September 10, 2012

Pregnancy Update - 17 Weeks


This past month has flown by...not feeling nauseous sure does make a difference!  I am still struggling with being tired, but that's okay, it will all be worth it in a few months!  I figure this whole pregnancy experience is preparing me to slow down and accept that it's okay to sit down and relax in the middle of the day!

Our 16 week appointment went well!  Everything looks and sounds perfect!  It's so amazing to hear that little heartbeat - it sure does beat fast!! According to babycenter.com this is what our little one is looking like this week.
Source
We've started tackling the baby's room.  At first it seemed like we just needed a new floor and some paint...but the project list has grown now!  I'll be sure to share more details in a future post but our to do list in that room includes:

  • Moving a closet wall
  • Replacing the ceiling
  • Rewiring the electrics & adding a ceiling light
  • Removing old carpet  & installing hardwood floors
  • Removing old wallpaper & painting the room
  • Decorating (that's my favorite part!)
Here is a sneak peek of the ugliness we're dealing with.  "Nice" green paint covering "beautiful" paneling on the bottom and an "elegant" shade of green painted over textured wallpaper!  At this point any change we make will be an improvement and dramatic! 


Friday, September 7, 2012

My First Loaf of Bread

I decided it was time to try and make homemade bread.  I needed to conquer my fear of yeast!  I had a yummy soup cooking in the crockpot and thought it would be perfect paired with some yummy homemade French bread so I set out on my adventure!  In the end it wasn't too bad!


Of course I strolled around pinterest to find a recipe.  I finally settled on this one from Mel's Kitchen Cafe, which she says she got from The Sisters Cafe. I was intrigued with the cycle kneading with the mixer instead of by hand.  I didn't change anything from her original recipe, and it turned out great!


The only thing I will do next time is bake each loaf on their own cookie sheet to give them a bit more breathing room.


The crust is the perfect crispiness and the bread texture itself is amazing!  Perfect paired with a yummy soup!


Wednesday, September 5, 2012

Pet Feeding Station

As we prepare for the baby's arrival organization is on the top of my to do list!  Did you ever see the movie Cheaper By the Dozen? The 1950's version, not the more recent one, I haven't seen that one maybe it's the same.  I often remember how the father in that movie tried to make everything more efficient...now I'm not going as extreme as he was, but I do think there is some value in eliminating walking from one end of the room to the other to get something when you could just keep at at the other end.

So anyway...I wanted to make feeding the animals more efficient.  Originally the cats had their food upstairs and the dog was downstairs.  Why we ever did that I have no idea, it doesn't make any sense!  Alas, I combined them all!


I used an IKEA shelf (I believe it is meant to be a TV stand).  It is the perfect height for Sanka with enough room underneath for the cats.  As you can see I still need to get a mat for under the cat's water.  Peanut has a terrible fascination with playing in the water so something has to be under it to soak up his mess!  
Next to the shelf there are two IKEA containers.  One with dog food and one with cat food.  It is amazingly efficient!  

As I've mentioned before Sanka and Peanut are best friends, so they enjoy eating together! 


Valentine prefers to eat alone, but she does seem to like the new set up! 


Monday, September 3, 2012

Oatmeal Raisin Bars

As my pregnancy progresses I'm trying to increase certain types of food into my daily diet, but in a creative way.  I've just started having cravings for sweet treats but I don't want to grab chocolate or cookies so I searched for something with a bit more nutritional value that would still satisfy my craving.


That is when I  came across a recipe for Sour Cream Raisin Bars by Cinnamon Spice and Everything Nice.
I followed her recipe almost exactly so I won't repeat it all, be sure to click through and check out her recipe.  The only thing I changed was using a little less white sugar.  Instead of 1 1/2 C I only used 1 C.  After eating these I would decrease it even more or perhaps skip the white sugar all together...I will experiment.

There are a few steps to these bars and that almost deterred me but I was so curious how the sour cream was going to taste in this type of recipe so I made them and it was totally worth it!
Besides I got to use my new pastry blender!


There are three layers to these bars.  The bottom crust, which is my favorite part!  Then the sour cream and raisin layer which gets cooked on the stove then layered on top of the bottom crust.  


The top layer is a loose crumb. 


After they bake they do need some time in the refrigerator to "congeal."  I was so anxious to taste them and did try them warm...it wasn't so good! Once they were chilled though they were very good!! 


Related Posts Plugin for WordPress, Blogger...